Tomach Build
About
The Tomach is a 54mm minimum-diameter rocket kit by Madcow Rocketry. While it is a commercially-manufactured rocket kit, I have made several modifications to best suit my needs of which I will outline below.
I named this rocket "Not an Engineer," after my chosen career path. :) Construction of the Tomach began in December 2014 and was completed in August 2015. Its first flight was on September 25, 2015 on one of my motors, a research L1200.
Specifications
- Length: 5 feet, 6 inches
- Diameter: 2 inches
- Motor: 54mm (minimum diameter)
- Airframe material: Fiberglass
- Fin meterial: Fiberglass
- Nosecone material: Fiberglass
- Altimeters: Featherweight Raven2 and a PerfectFlite StratologgerCF.
- Recovery: Drogueless and a 36" Public Missiles main chute.
Construction Photos
Click any image to view it larger.
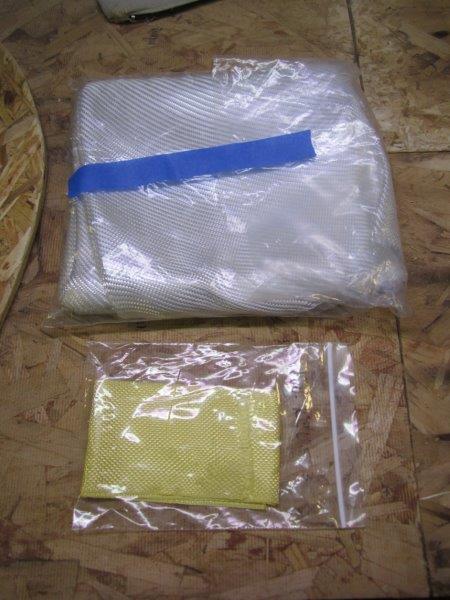
Rocket Kit
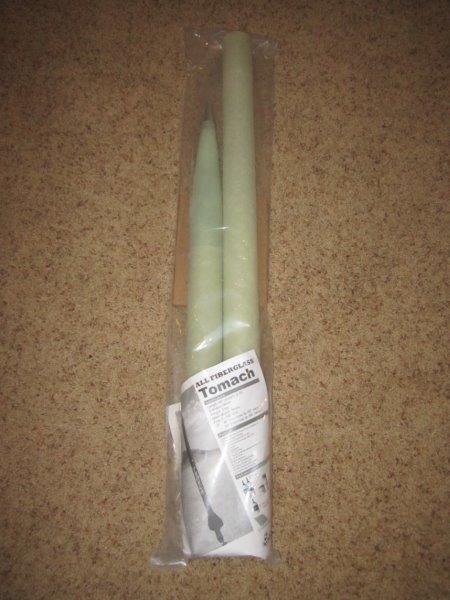
The kit looks like this.
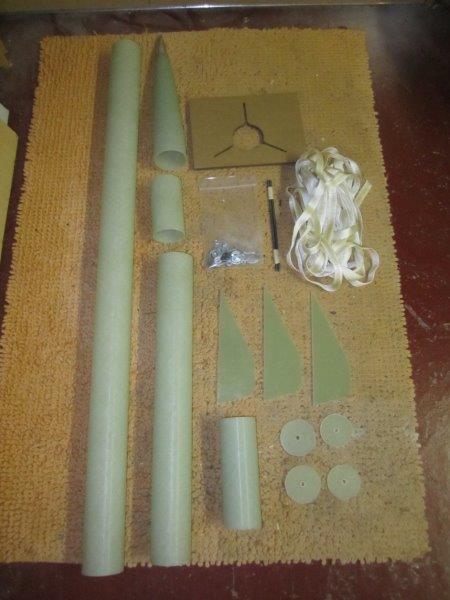
And this is what's included with the kit - fiberglass components, av-bay parts, fin alignment guides, and shockcord.
Altimeter Bay

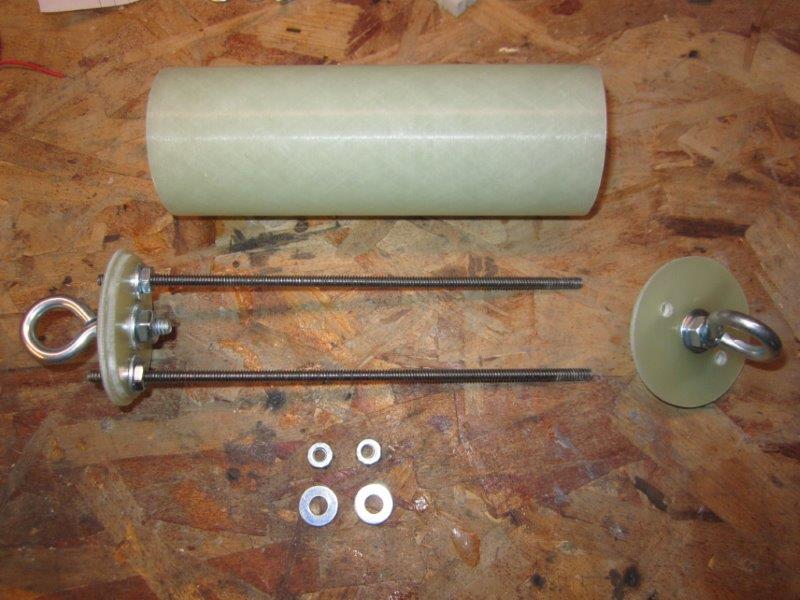
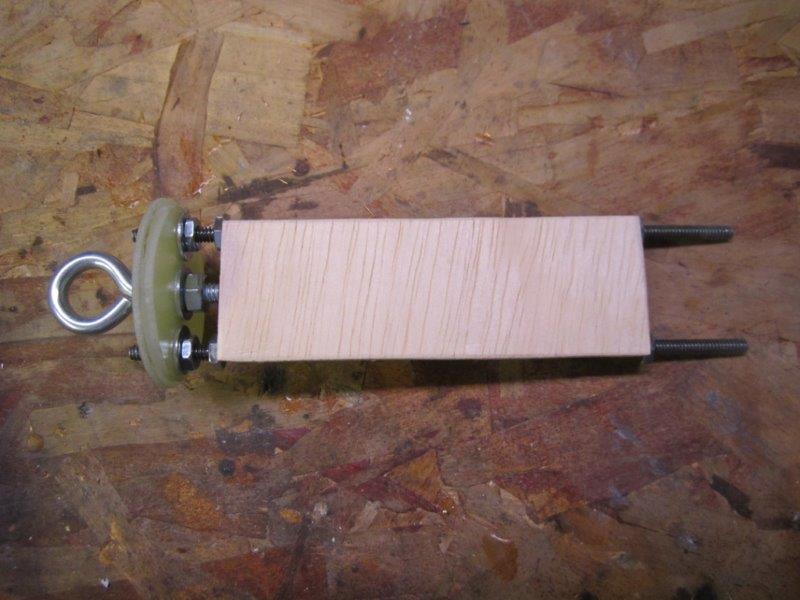
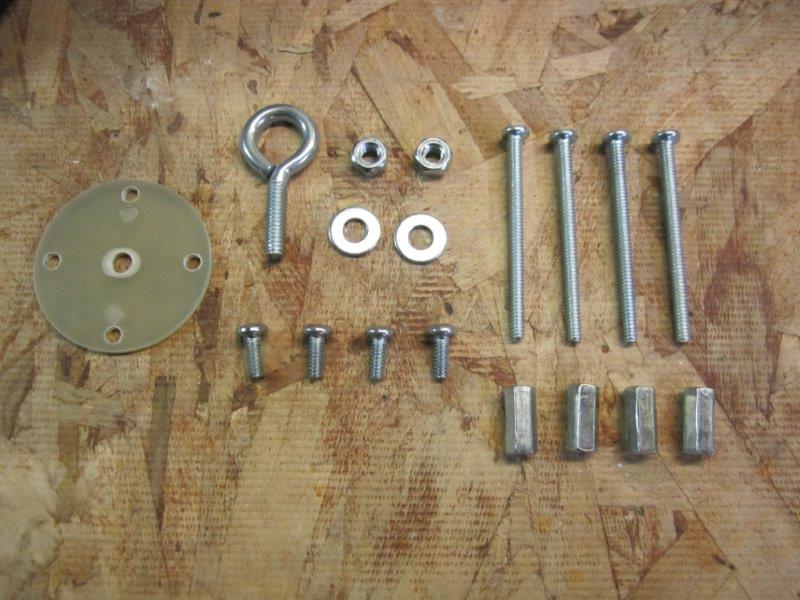
Construction of this rocket began with the altimeter bay. Pictured here are all the individual parts, with extra bulkheads/nuts/washers added as needed. The eyebolts are 1/4", and the all-thread rods are 3/16".
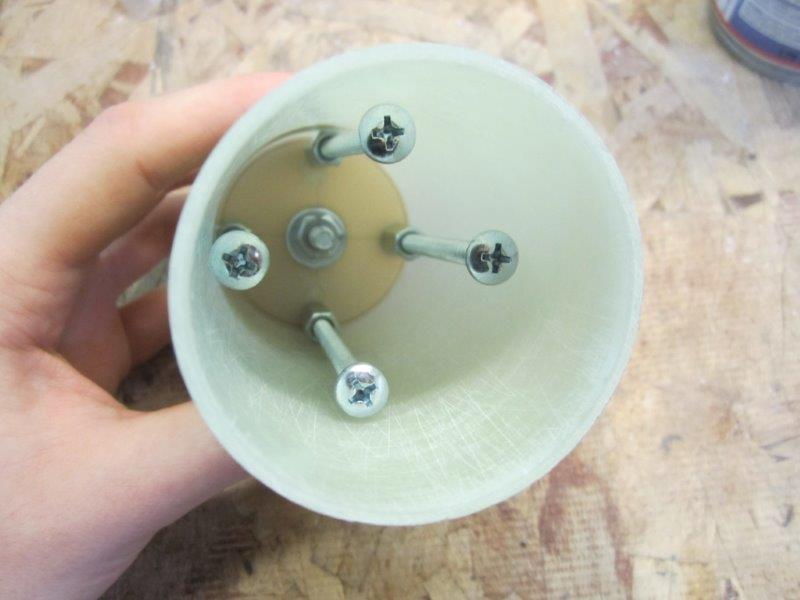
Assembled internal components.

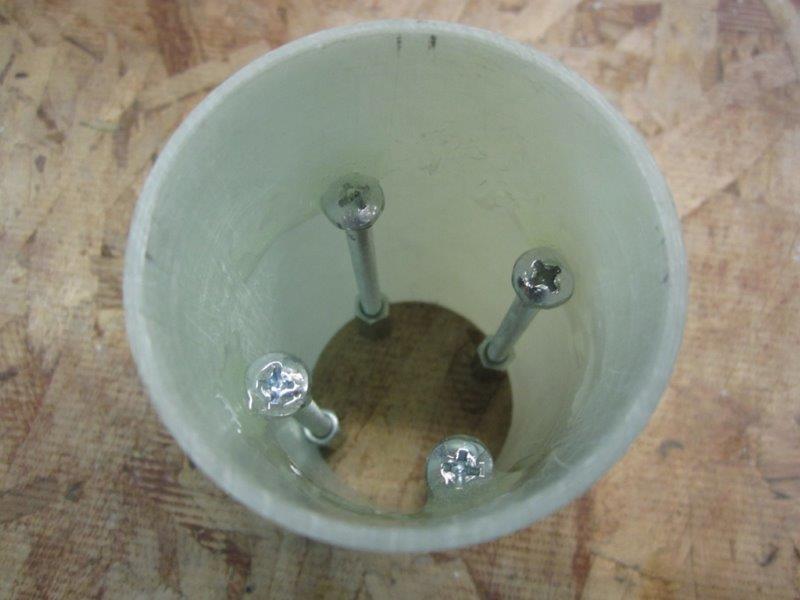
Assembled av-bay exterior.
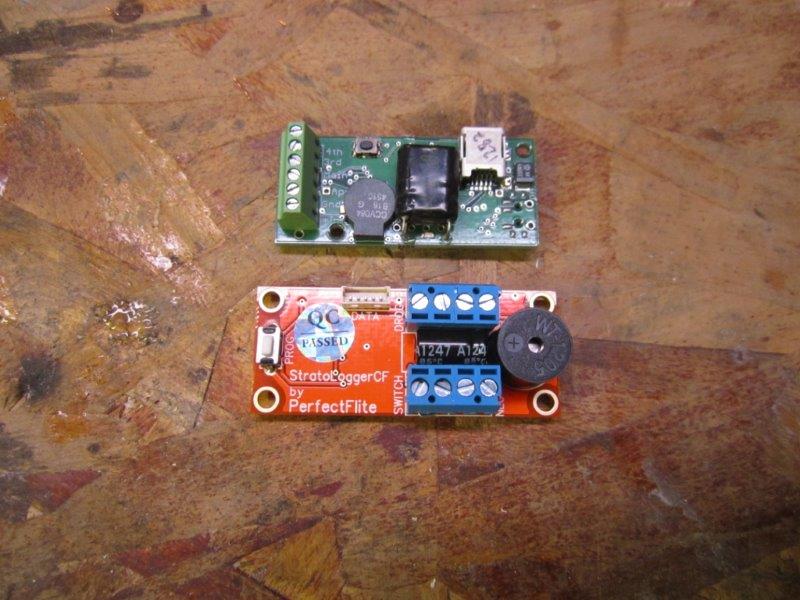
For altimetes in this rocket I will be using a Featherwight Raven2 and a PerfectFlite StratologgerCF.
Av-bay sled mounted into place.
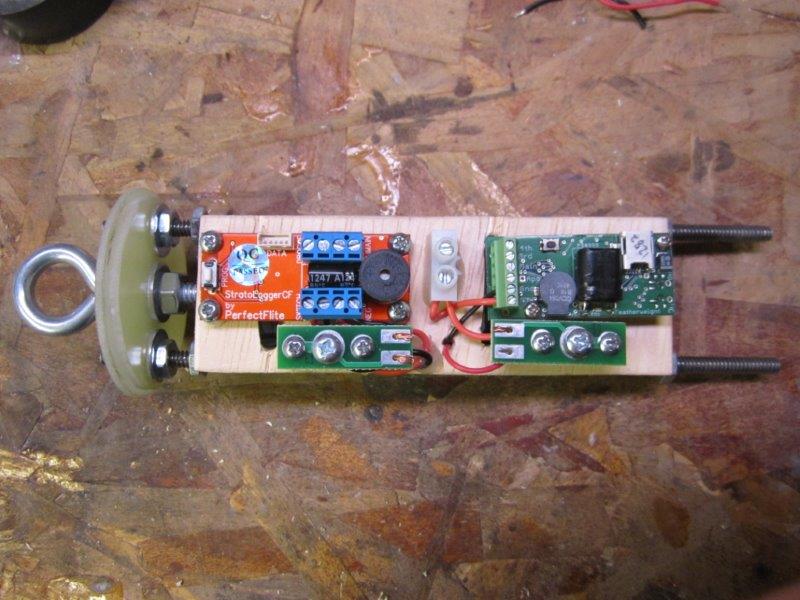
Av-bay sled complete with altimters, wiring, and power switches. For this rocket I used screw switches from MissileWorks.
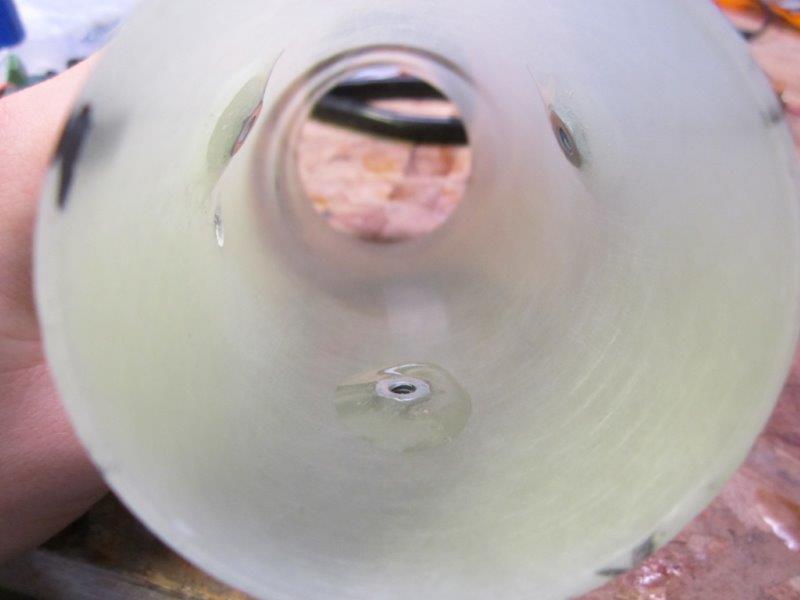
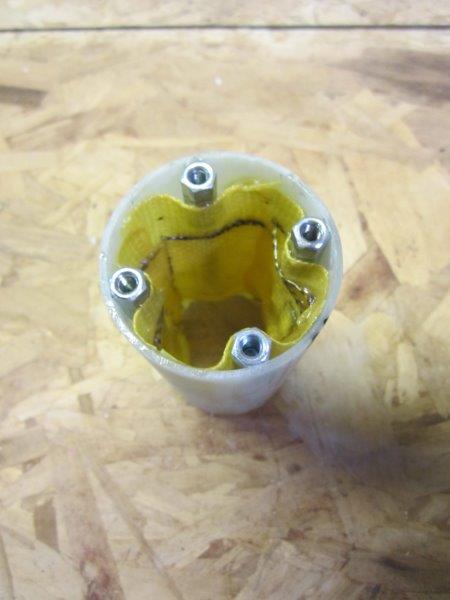
To secure the av-bay to the forward section of the rocket, I used #6-32 hex nuts epoxied inside the coupler. T-nuts work best for this application, but they would not have fit in a 54mm coupler.
From the outside, they look like this.
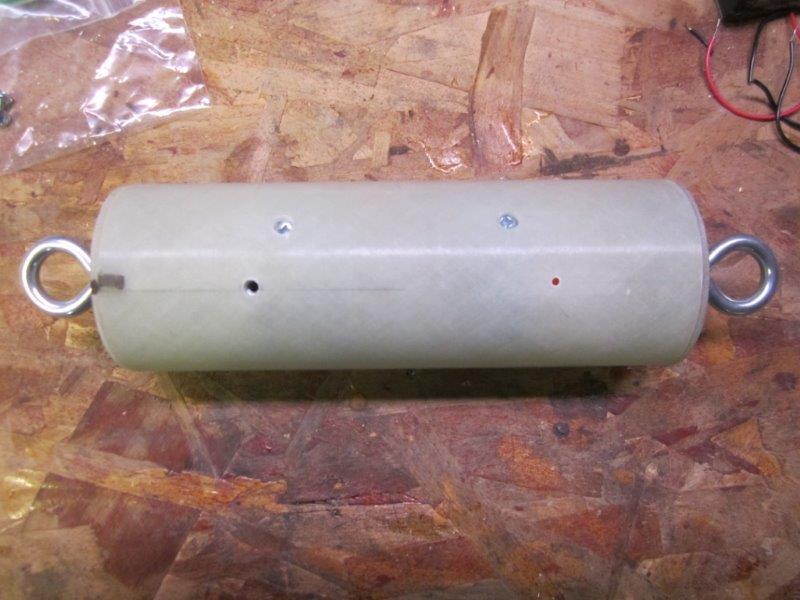
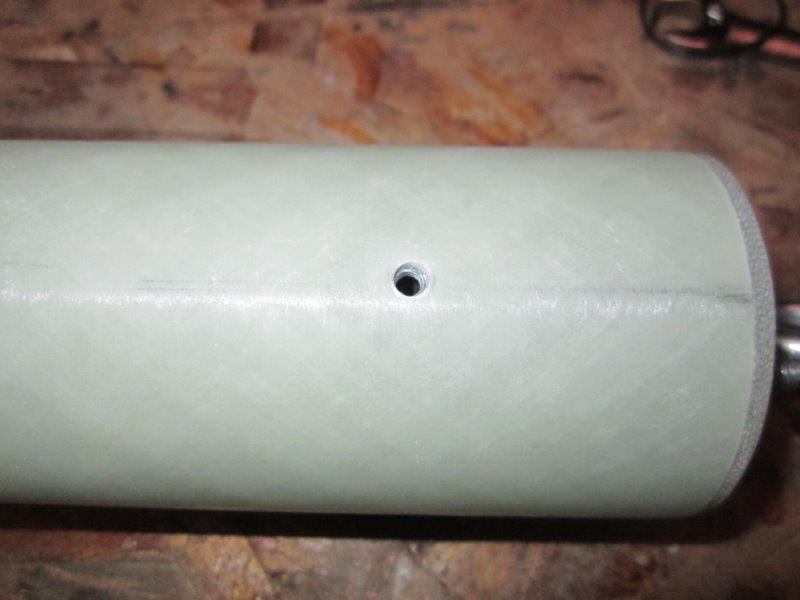
The remainder of the av-bay exterior then has holes drilled in it to access the screw switches, as well as for #2-56 shear pins.
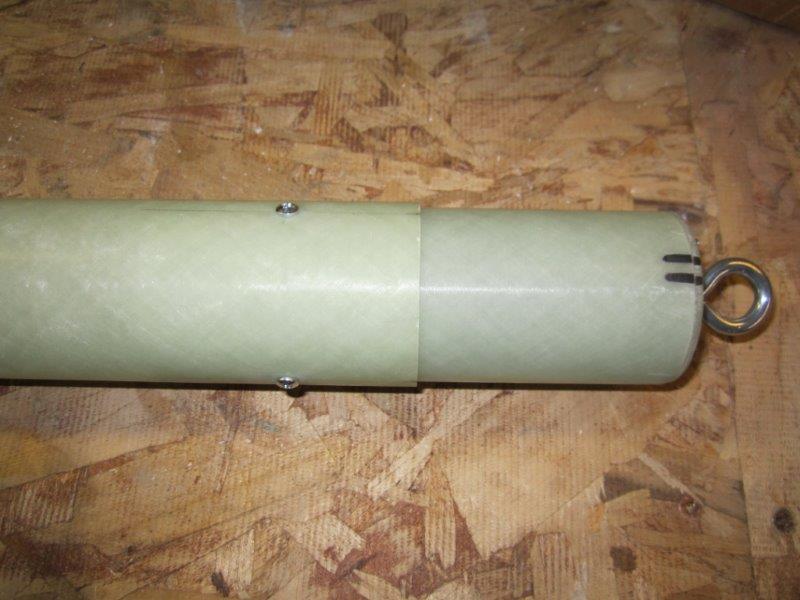
The av-bay is then mounted in place using #6-32 machine screws.
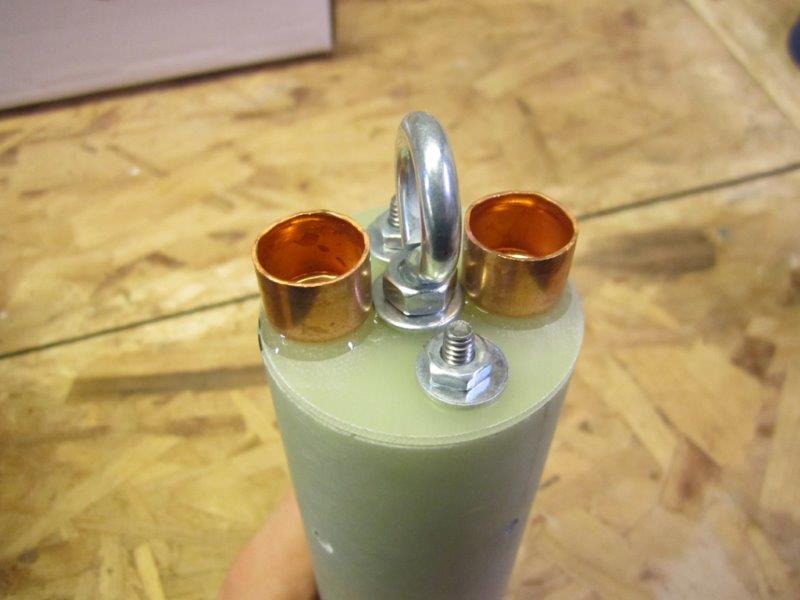
For ejection charge holders, I used 3/4" copper pipe caps as they fit perfectly on each av-bay lid.
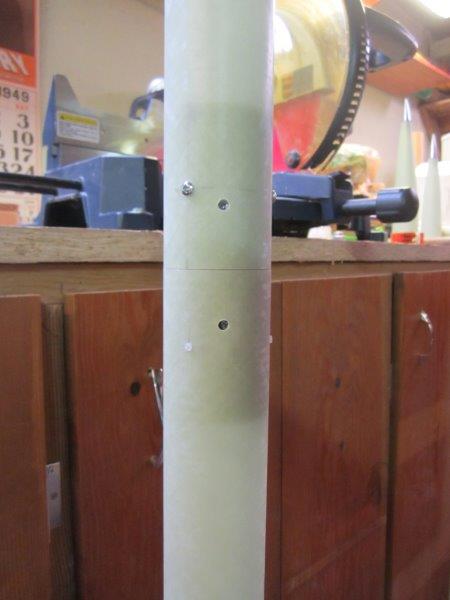
Once installed inside the rocket, you can see all the holes lined up for switch access, machine screws, and #2-56 shear pins.
Nosecone
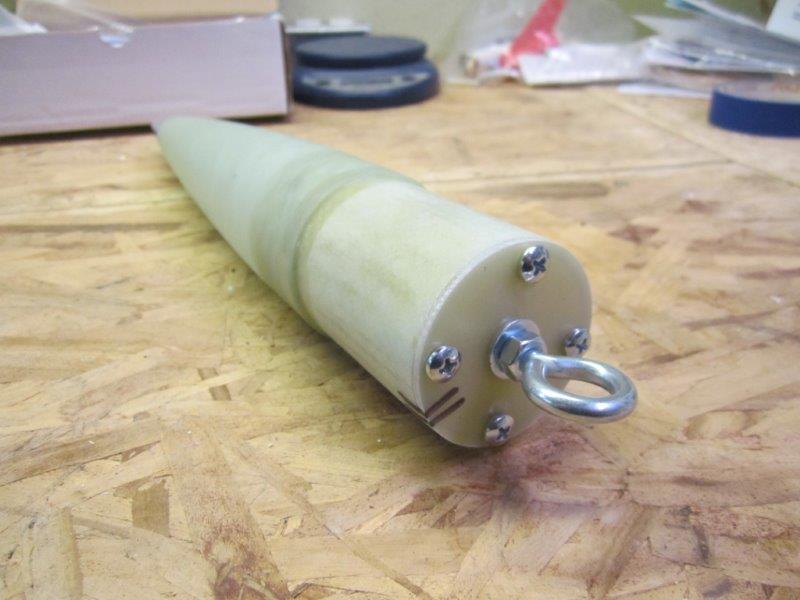
Next, we move on to the nosecone. For this rocket I used the tried-and-true Vern Knowles system of machine screws and Kevlar. Shown here is all of the hardware used in the nosecone - 1/4" eyebolt with nuts/washers, #10-24 x 2 1/2" pan head machine screws, #10-24 x 1/2" pan head machine screws, and #10-24 hex couplers.

We begin by threading each screw into place on the bulkhead.
Then, we insert that assembly into the nosecone coupler.
A dab of hobby epoxy on each screw head tacks them in place for the next step.

Once the anchors have been tacked into place and the epoxy has cured, we remove the bulkhead.

Kevlar strips are used to secure the nosecone anchors.
We begin by saturating the Kevlar strips in West Systems epoxy and lay them tightly across each anchor. Let this cure, then add another layer of Kevlar strips to the whole assembly.
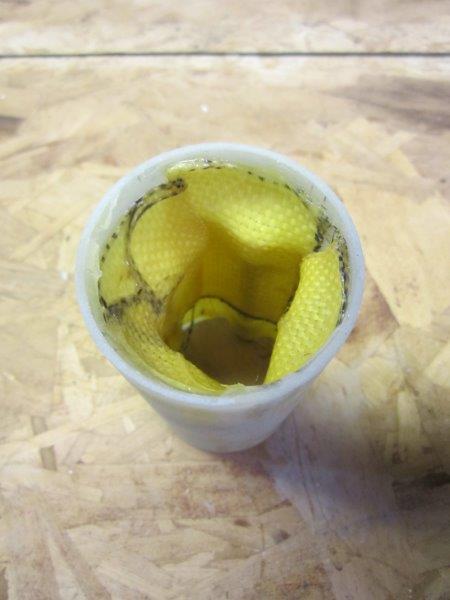
The aft end of the coupler looks like this, with the Kevlar strips covering the ends of each anchor.
Once everything is fully cured, the nosecone coupler is epoxied into place.
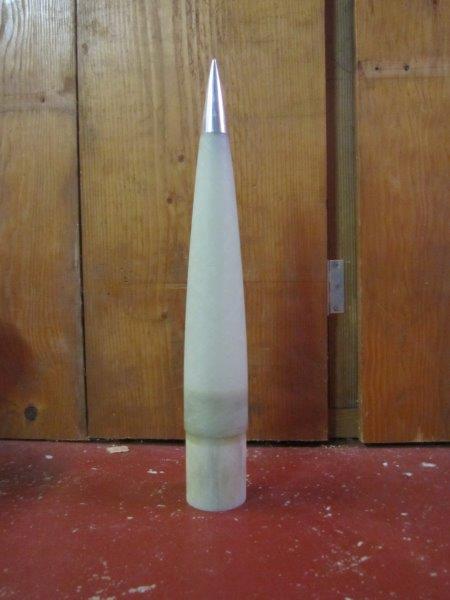
Completed nosecone.
Fin Can
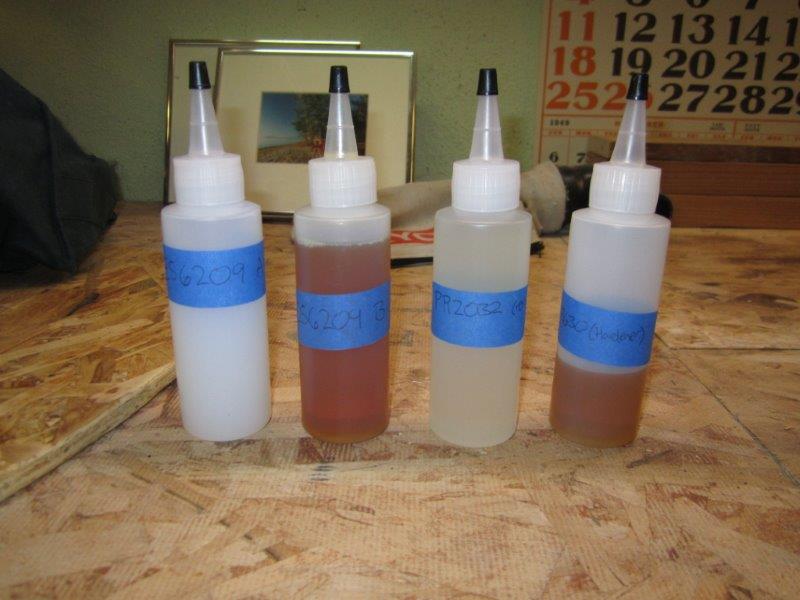
Here is the "lineup" of adhesives I'll be using on this rocket. Going from left to right we have: Aeropoxy ES6209 A, ES6209 B, PR2032, and PH3630.
In addition to the (yellow) Kevlar used for the nosecone, we will also be doing tip-to-tip on the fins using fiberglass cloth.
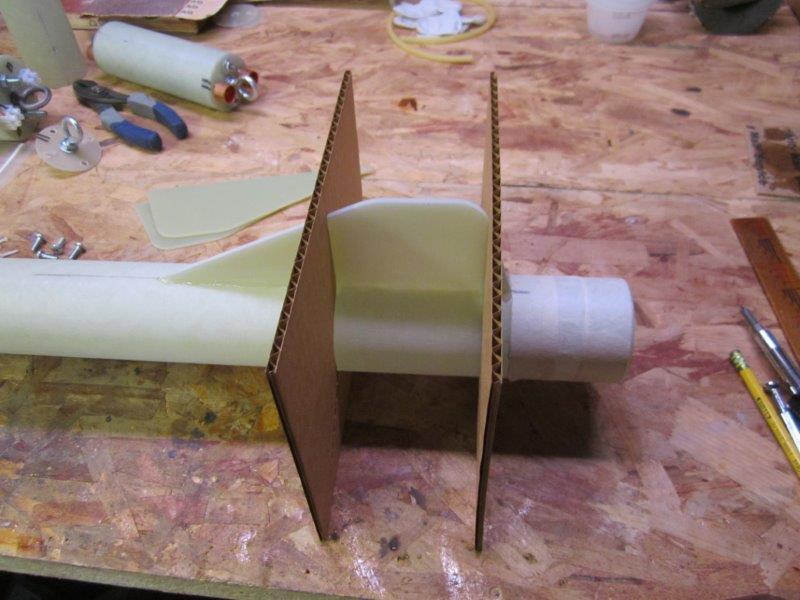
First fin set using Aeropoxy ES6209 and the supplied fin alignment guides. Note that the airframe has been sanded with 80-grit sandpaper prior to gluing.
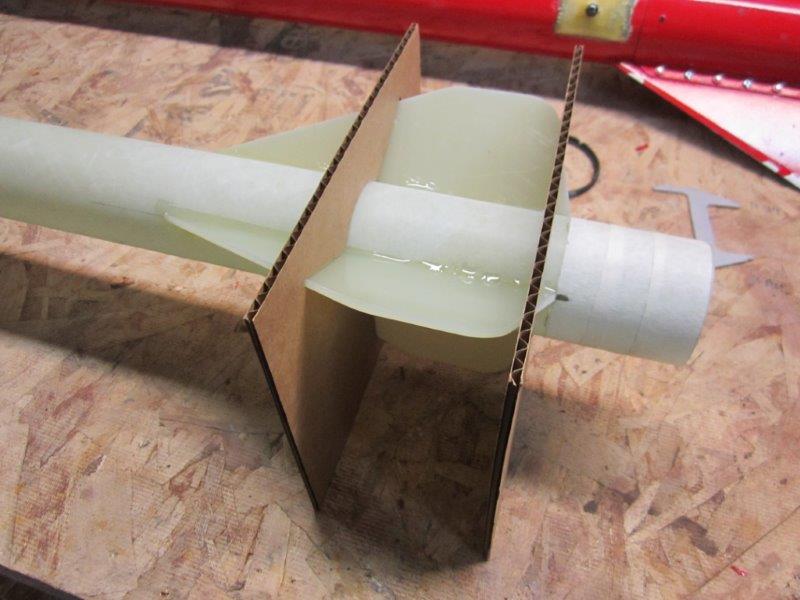
After that cures, we epoxy the 2nd and 3rd fins into place.
Once all the fins are set and fully cured, we move onto fillets, also using ES6209 and a tongue depressor.
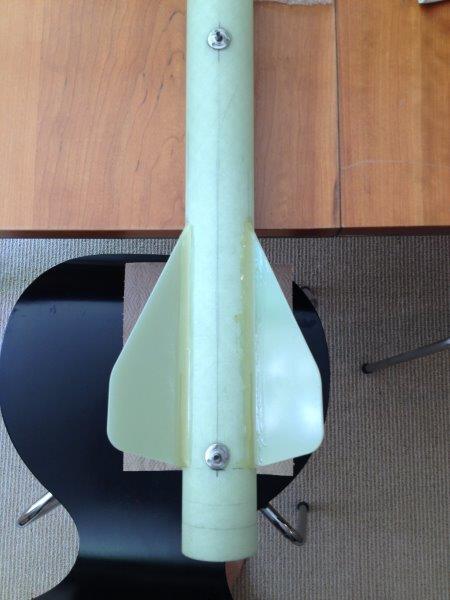
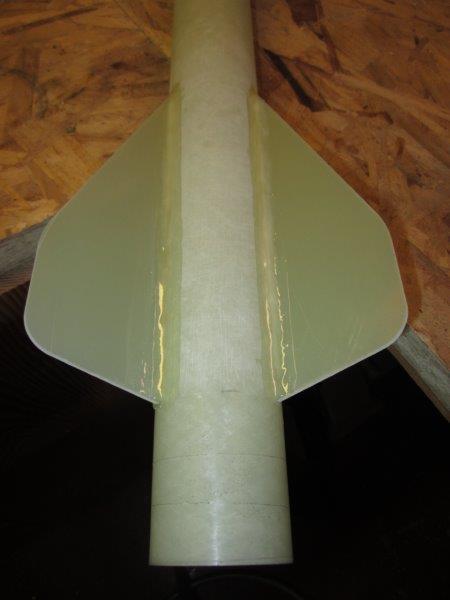
Along with the 3rd set of fillets shown here, at this time we also glue on 2 x #8-32 weld nuts for use as rail button attachments.
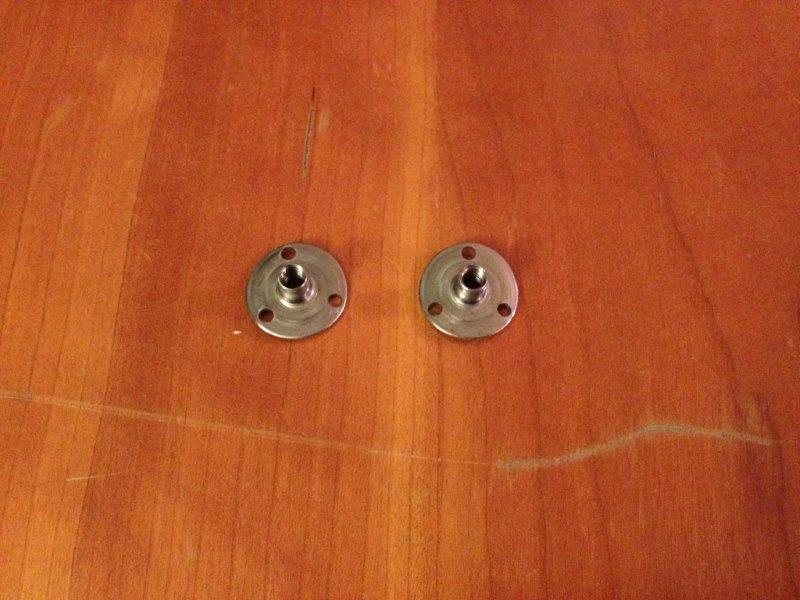
The actual weld nuts look like this. For this rocket, we will be using the exact same method as we did for Great BALLS of Fire.
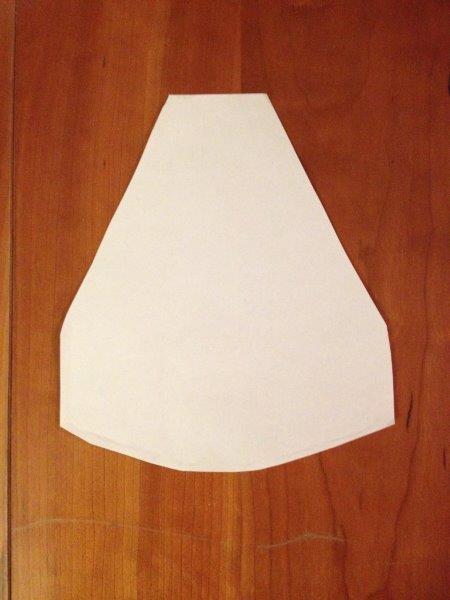
Now, we move onto fiberglass tip-to-tip for the fins. First, we cut a paper template of the fin pattern.
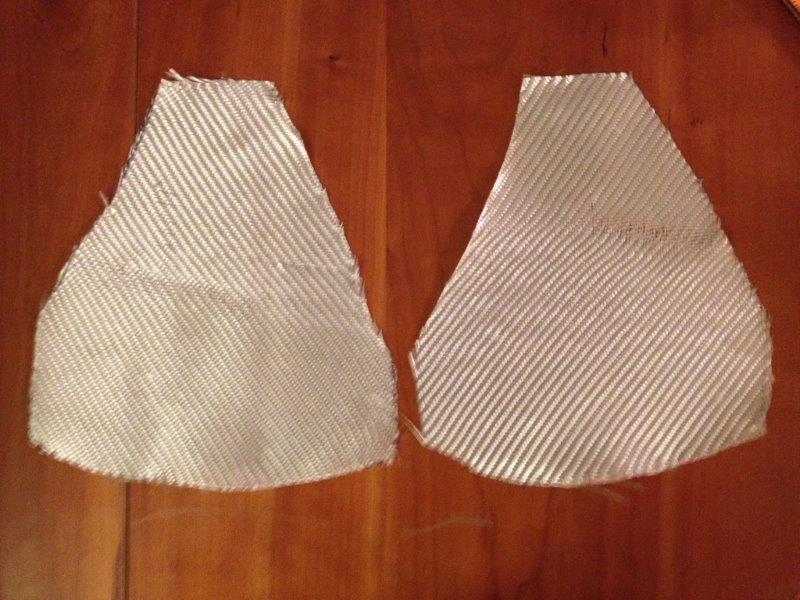
Next, we use that template to cut some pieces of fiberglass cloth to size.
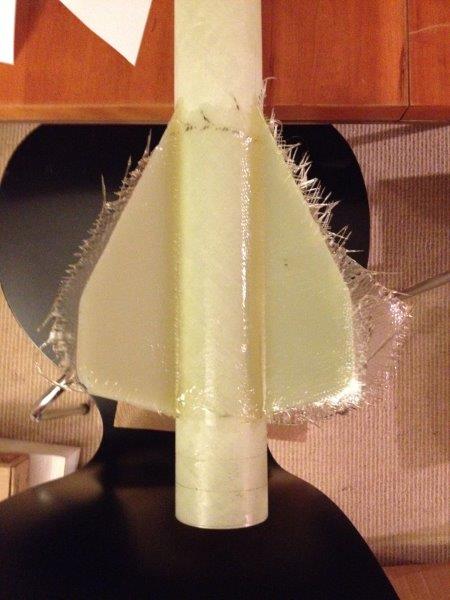
A piece of fiberglass cloth is then soaked in Aeropoxy PR2032/PH3630 and applied to each set of fins, as shown.
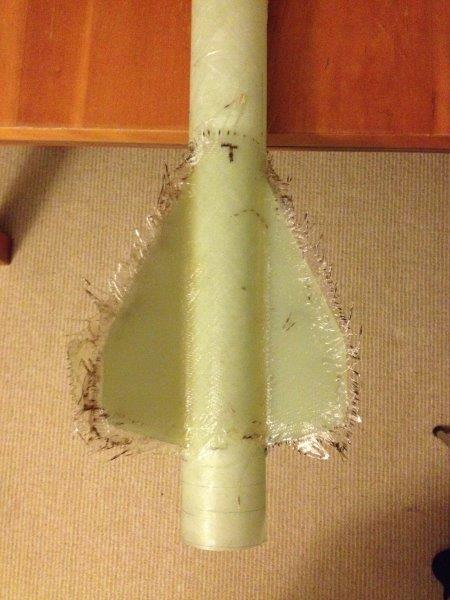
After that cures, we go back and add a second layer of fiberglass for extra strength.
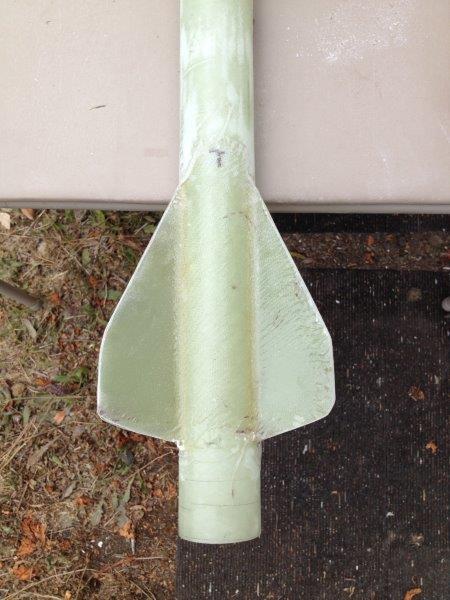
Now that the tip-to-tip is done, we can sand off the excess fiberglass cloth using an orbital sander.

Lastly, we add a bevel, also using the orbital sander.
Recovery

The Madcow Tomach kit comes with 30' of tubular nylon shockcord. Logically, this means we'll use 15' in each section of the rocket. (Drogue and main.) Since this is a fairly lightweight rocket, it is not neccessary to use a drogue, as shown here. The 15' of tubular nylon between the fin section and upper section will be sufficient in de-streamlining the rocket during its decent.
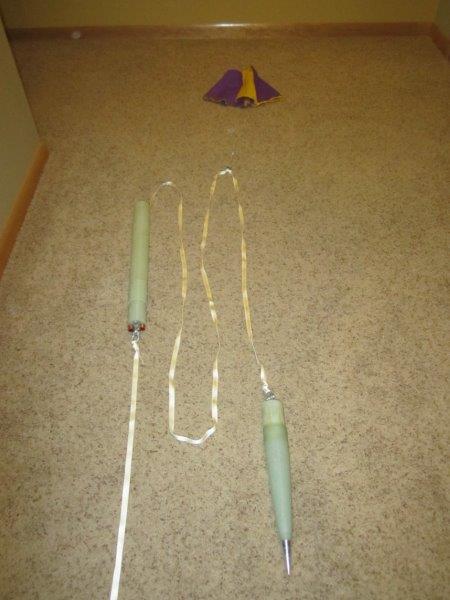
The other 15' goes in between the upper section and nosecone. For the main chute, a 36" Public Missiles Ltd chute is attached below the nosecone.
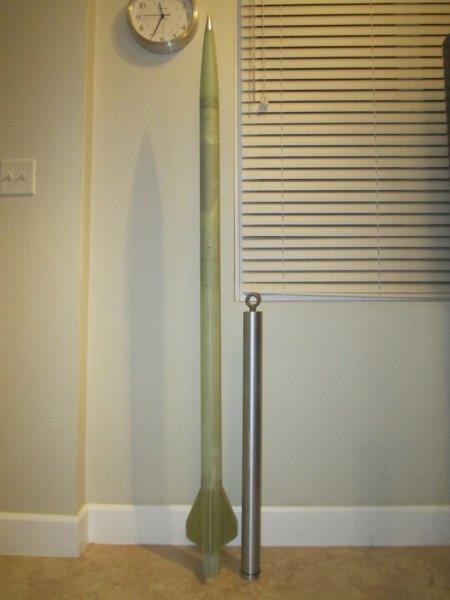
Completed rocket with a research L motor for comparison.
Flight Log
- September 25, 2015 - Research L1200 (Black Rock Desert, NV).
- First flight, max altitude 14,929'.
- April 30, 2016 - Research L1100 (Brothers, OR).
- Max altitude 15,372'.